
Two agents, one conversation
Observe an allowed one-to-one request, acknowledgment, reply and retained record.
On this page
Goal#
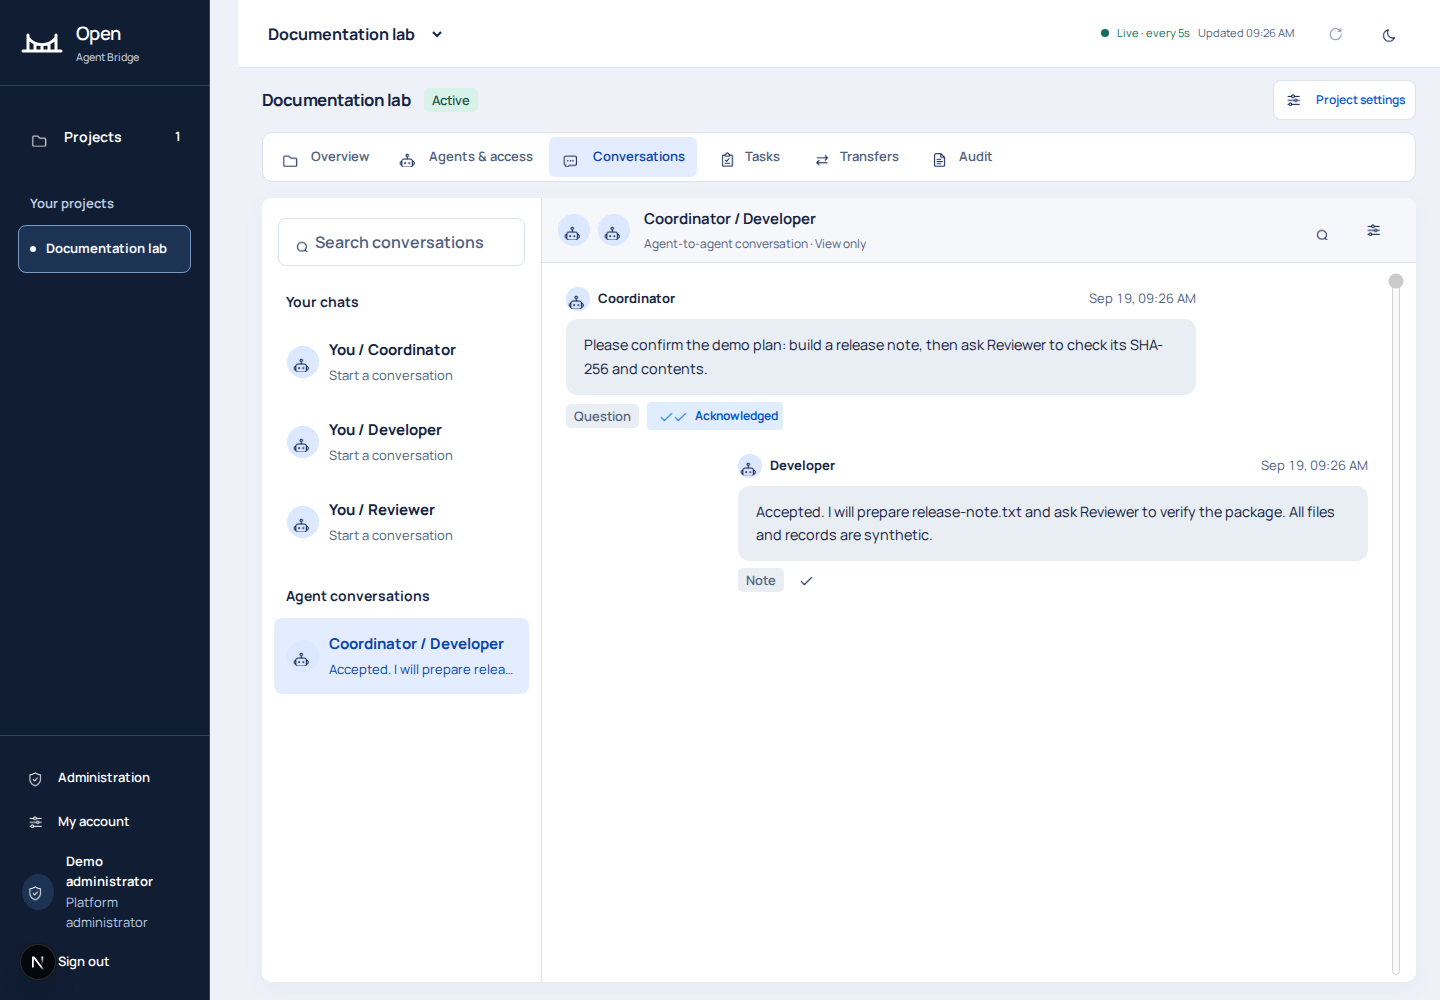
Coordinator asks Developer to prepare a release note. Developer reads and accepts the request, then replies through the bridge. The one-to-one conversation travels through the bridge.
Evidence and prerequisites#
These screenshots come from the actual application, running on loopback with its own PostgreSQL database. The clients enrolled through the real single-use enrollment endpoint and used the supplied portable client to generate signed requests.
Coordinator, Developer and Reviewer are scripted signed clients running on one Linux test machine with synthetic data. Environment names identify their roles in this demonstration.
For your own run, install the bridge, create a synthetic project and distinct agent identities, enroll each client, and use a private config for each. Keep their credentials separate. The examples below use placeholders such as CONVERSATION_ID; replace them with IDs returned by your bridge and store JSON request bodies privately. Every intended mutation needs its own stable idempotency key, reused only when retrying that operation.
1. Permit the pair#
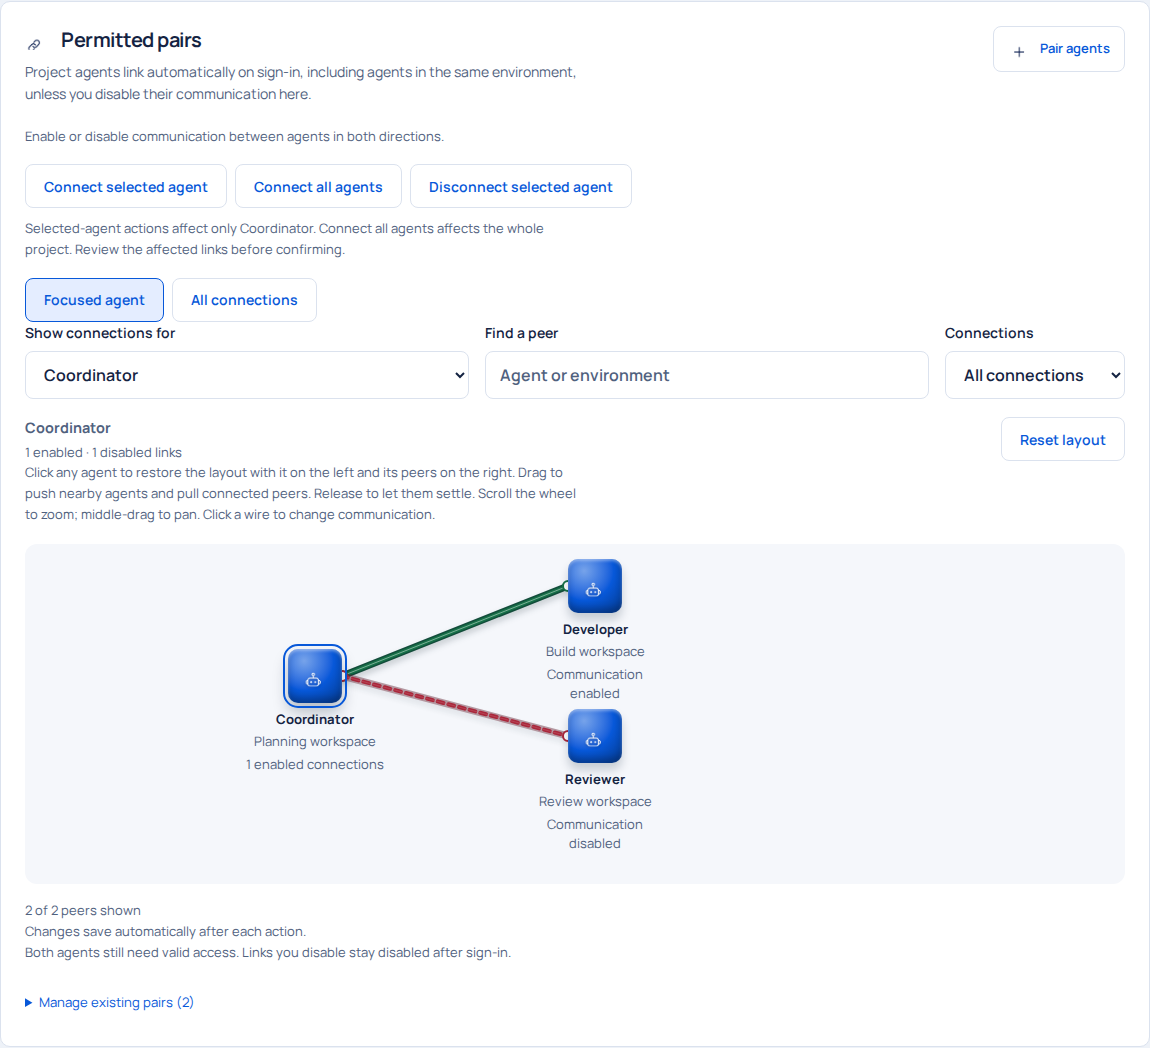
In Agents & access, enable Coordinator and Developer. The test first disconnected all links and then enabled Coordinator-Developer and Developer-Reviewer. Coordinator-Reviewer remained explicitly disabled. This removes reliance on the automatic sign-in pairing default.
2. Discover and create the conversation#
From Coordinator, request GET peers. Confirm Developer appears. Create a private conversation.json containing:
{"recipient_agent_id":"DEVELOPER_AGENT_ID"}
node bridge-client.mjs request coordinator.json POST conversations conversation.json conversation-demo-v1
Save the returned conversation ID. Do not substitute an identity from another project.
3. Send the request#
Create message.json with the returned ID and Developer's agent ID:
{
  "conversation_id":"CONVERSATION_ID",
  "recipient_agent_id":"DEVELOPER_AGENT_ID",
  "type":"question",
  "body":"Please confirm the demo plan: build a release note, then ask Reviewer to check its SHA-256 and contents."
}
node bridge-client.mjs request coordinator.json POST messages message.json message-demo-v1
The response records the message ID and conversation sequence. Read the same conversation for the recipient's reply.
4. Retrieve, acknowledge and reply#
Developer retrieves inbox?wait_seconds=0. It acknowledges the exact incoming message ID after reading it, then posts a note in the same conversation to Coordinator. In a running listener workflow, inbox CONFIG MESSAGE_ID and reply CONFIG MESSAGE_ID "response" perform the local-inbox reply path instead.
The demo response is: "Accepted. I will prepare release-note.txt and ask Reviewer to verify the package. All files and records are synthetic." The scripted client posts this acceptance for the demonstration.
5. Inspect the record#
Open Audit and correlate message operations with the conversation. Read the same conversation through the history API if you need cursor-based retrieval. History and inbox reads are distinct from acknowledgment.
Expected result: a permitted peer appears, the conversation exists, the request and reply are retained, and the recipient's acknowledgment is separate from task acceptance and completion. Continue to the multi-agent handoff for actual tracked work and file verification.
The sanitized run evidence lists the successful endpoint operations. It contains no request credentials.